Breaking Free from Your API

I have been noticing off-late that as a UI developer, I dabble less in what can be considered programming and more often in HTML and CSS and making them work across the bazillion browsers out there. The closest I get to what can be considered writing lines of code is where the interaction requires a few lines of JavaScript to transition a control in or out of the screen or some Ajax operation to send data across the wire or update the view. And even such programming is greatly abstracted away, thanks to frameworks such as jQuery. With the browser taking care of everything, from drawing widgets, to layout, to handling user interaction, there is little left to do other than send the page layout to the browser. Sadly, that is the lot of most UI developers who have been reduced to pixel-pushers in this advent of web-based applications.

Even the folks who develop RIAs on platforms such as Flash and Silverlight do not feel the need to get into performance oriented code beyond optimizing network requests.

Don’t worry about widgets. Don’t fiddle with the whatchamacallit. Don’t! Don’t! It is all done! Just fetch me another recordset, sonny. And make it snappy!

And though this kind of work does pay the bills, every once in a while someone runs into a problem that cannot be addressed through an API call. When that happens, the first reaction of the average development team is to clutch at their hair and run around in circles screaming “Omigod! Omigod! Omigod!” And though someone on the team usually manages to whack something out over a weekend, it often isn’t the best solution because nobody has done this before! Whereas programmers of yore that I worked with never flinched at getting their hands dirty with low-level stuff, even up to writing custom extensions to their platform in a language like C, many of today’s programmers work on enough abstractions to make the underlying hardware and operating system entirely irrelevant. To them, the browser or virtual machine is the machine.

Where Does One Draw the Line?

Let me lead you through a programming exercise using ActionScript that demonstrates the joy of extending missing API calls. We are not inventing new algorithms here, but implementing a simple, well-defined solution for drawing lines on raster displays using the slope-intercept formula. Then we are coming up with a better implementation, using a better algorithm, trading performance and accuracy to reach a balanced result in the end.

[swf]http://www.notadesigner.com/wp-content/uploads/2012/10/line.swf, 400, 400[/swf]

The Shape of a Line

For those who do not remember high-school geometry and algebra, a line can be specified by providing its start and end coordinates, using the slope-intercept formula to determine the path between these two points. This information used to be enough to display lines on vector displays of yore, which could draw all sorts of mathematically defined shapes. But with the advent of raster displays which only allow discrete pixels to be turned on, lines and other shapes are now displayed by calculating the pixels which approximate the ideal line as closely as possible.

The slope intercept formula goes as follows –

y = (y1 – y0) / (x1 – x0) * x + b

This is further condensed into –

y = m * x + b

Here m is the slope of the line, which is the ratio of rise against the run. The value b represents the y-intercept, which is the location where the line crosses the origin on the y-axis. So to compute the y-coordinate on any given x-coordinate on that line, you multiply the slope of the line with the x-coordinate and add the y-intercept to the result. To extend this into drawing lines, you would run a loop incrementing a value between the start and end x-coordinates and computing the y-coordinate with each iteration.

Here is an implementation.

public static function lineSimple(bmdCanvas:BitmapData, x0:int, y0:int, x1:int, y1:int, lColor:uint)
{
	/**
	 * Naive implementation of slope-intercept formula
	 */

	var m:Number;
	var b:Number;
	var dx:Number, dy:Number;

	dx = x1 - x0;
	dy = y1 - y0;

	if (dx != 0)
	{
		m = dy / dx;
		b = y0 - m * x0;
		dx = (x1 > x0) ? 1 : -1;

		while (x0 != x1)
		{
			x0 += dx;
			y0 = m * x0 + b;

			bmdCanvas.setPixel32(x0, y0, lColor);
		}
	}
}

This is a very straight-forward implementation and leaves a lot to be desired. But let us take it line by line to understand it.

The first 2 lines calculate the difference between the start and end points in both axes. Then it divides dy by dx after checking for a potential divide by zero error and then calculates the slope and the y-intercept of the line. It also changes the value of dx to 1 if the x-coordinate of the second point is greater than the x-coordinate of the first point, or -1 if it is less than.

We now enter the loop which continues until x0 becomes greater than or equal to x1. Inside this loop it increments the value of x0 by dx (1 or -1) and calculates the value of y0 using the slope-intercept formula. It then places a pixel at the newly calculated coordinate and continues the loop.

This is a very simple implementation and just barely does the job. In fact, it does not even cover all possible cases that a line-drawing function might run into. For example, this will not work correctly if the slope of the line is greater than 1 (in other words, if the line is taller than it is wider). As the loop iterates over values in the x-axis, it plots exactly one pixel in every column while possibly plotting more than one pixel in the same row. But when the line becomes steep, there are fewer columns than rows. Since the algorithm iterates over the x-axis and computes the position in the y-axis, the distance between consecutive pixels on the y-axis increases as the line becomes steeper and makes for a discontinuous line.

Resolution for Slopes Greater than 1 or Negative Slopes

To resolve this issue, with come up with a second iteration of our line drawing function. This function first calculates the slope of the line and if it is less than 1 then it continues using the previously demonstrated algorithm. But if the slope is greater than 1 or less than -1 then it increments the value of the y-axis in the loop and computes the position in the x-axis. The complete implementation is shown below.

public static function lineImproved(bmdCanvas:BitmapData, x0:int, y0:int, x1:int, y1:int, lColor:uint)
{
	/**
	 * Advanced implementation of slope-intercept formula
	 * to handle slopes greater than 1 or less than -1
	 */

	var m:Number;
	var b:Number;
	var dx:Number, dy:Number;

	dx = x1 - x0;
	dy = y1 - y0;

	if (Math.abs(dx) > Math.abs(dy))
	{
		/**
		 * Slope is < 1 or > -1
		 * Increment horizontally
		 */

		m = dy / dx;
		b = y0 - m * x0;
		dx = (x1 > x0) ? 1 : -1;

		while (x0 != x1)
		{
			x0 += dx;
			y0 = m * x0 + b;

			bmdCanvas.setPixel32(x0, y0, lColor);
		}
	}
	else if (dy != 0)
	{
		/*
		 * Slope is > 1 or < -1
		 * Increment vertically
		 */

		m = dx / dy;
		b = x0 - m * y0;
		dy = (dy < 0) ? -1 : 1;

		while (y0 != y1)
		{
			y0 += dy;
			x0 = m * y0 + b;

			bmdCanvas.setPixel32(x0, y0, lColor);
		}
	}
}

This program is essentially the same as the previous one but functionally complete to render lines correctly for all possible cases. But there is plenty of room for optimization. Firstly, it uses floating point numbers for what is eventually to be plotted on screen as pixels, which are in whole numbers. Secondly, it computes the value of the next pixel using the slope-intercept formula. This can be optimized away by pre-calculating this equation once out of the loop and then incrementing the value of the row or column in the loop.

Optimization of Inner Loops

public static function lineDDA(bmdCanvas:BitmapData, x0:int, y0:int, x1:int, y1:int, lColor:uint)
{
	/**
	 * Line drawn using DDA algorithm
	 * Optimizations are made by replacing the repetitive
	 * calculations of the slope-intercept formula in
	 * the loop with 2 division operations outside it
	 * and instead incrementing the values of x and y
	 * variables with these pre-computed numbers
	 * inside the loop
	 */

	var dx:Number, dy:Number;
	var steps:Number;
	var m:Number;
	var x:Number, y:Number;
	var xinc:Number, yinc:Number;

	// Determine the direction of incrementation based on the slope
	dx = x1 - x0;
	dy = y1 - y0;
	if (Math.abs(dx) > Math.abs(dy))
		steps = Math.abs(dx);
	else
		steps = Math.abs(dy);

	// Calculate the incrementation for each axes
	xinc = dx / steps;
	yinc = dy / steps;

	x = x0;
	y = y0;

	for (var i:Number = 1; i < steps; i++)
	{
		x += xinc;
		y += yinc;
		bmdCanvas.setPixel32(x, y, lColor);
	}
}

This algorithm does not use the slope-intercept formula at all. Instead, it calculates the difference between the start and end points and increments the position on both axes in the loop. Whereas calculating the y-coordinate with the slope-intercept formula requires the use of one multiplication and one addition, incrementing the y-coordinate only requires a single addition operation, which makes it blazingly fast.

Further Speed Gains

Floating point operations are desirable for plotting on vector graphics terminals because they are capable for drawing a continuous line. But when using raster displays, which only allow plotting discrete points to approximate a true line, floating point data becomes redundant. Thus, if we can find a way to compute a line using only integers, we can speed up our algorithm, while not losing any substantial information because the pixels used to approximate the line are whole numbers anyway.

Bresenham’s Line Drawing Algorithm uses integers to plot a line on the screen. An implementation is shown below.

public static function lineBresenham2(bmdCanvas:BitmapData, x0:int, y0:int, x1:int, y1:int, lColor:uint)
{
	var dx:int;
	var dy:int;
	var stepx:int
	var stepy:int;
	var counter:int

	// Calculate the difference between the start and end coordinates
	dx = x1 - x0;
	dy = y1 - y0;

	// Determine the direction of the increment in both axes
	if (dx < 0)
	{
		dx = -dx;
		stepx = -1;
	}
	else
	{
		stepx = 1;
	}

	if (dy < 0)
	{
		dy = -dy;
		stepy = -1;
	}
	else
	{
		stepy = 1;
	}

	bmdCanvas.setPixel32(x0, y0, lColor);

	dx <<= 1;
	dy <<= 1;

	if (dx > dy)
	{
		/** Line is wider than it is taller */

		/**
		 * Counter is used to track the number of times
		 * dx is divisible by dy. The value of dy is
		 * repeatedly subtracted from it on every iteration
		 * until it becomes less than or equal to 0.
		 * When that happens, the y-coordinate is incremented
		 * by stepy and counter is reset to dx.
		 */
		counter = dx;

		while (x0 != x1)
		{
			/**
			 * Increment the y-coordinate by stepy when
			 * the counter becomes less than 0
			 */
			if (counter <= 0)
			{
				y0 += stepy;
				counter += dx;
			}

			// Increment the x-coordinate on every iteration
			x0 += stepx;

			// Reduce the counter by dy
			counter -= dy;

			bmdCanvas.setPixel32(x0, y0, lColor);
		}
	}
	else
	{
		/** Line is taller than it is wider */

		counter = dy >> 1;

		while (y0 != y1)
		{
			if (counter <= 0)
			{
				x0 += stepx;
				counter += dy;
			}

			y0 += stepy;
			counter -= dx;

			bmdCanvas.setPixel32(x0, y0, lColor);
		}
	}
}

Division here is implemented as a series of continuous subtractions. The initial value of the variable fraction is set to dx. Assuming that the line is to be plotted from 0,0 to 100, 10, the values of dx and dy are 100 and 10, respectively. Thus, fraction is assigned the value 100. The variables x0 and y0 are the starting coordinates of the line. With each iteration of the loop, x0 is increased by 1 and the value of dy subtracted from fraction. When the fraction becomes less than or equal to 0, the y-coordinate is incremented by 1 and the counter reset to dx. The variable dy can be subtracted from counter dx / dy times before it becomes less than or equal to 0, making it a brute-force form of division.
A Bicycle Like No Other

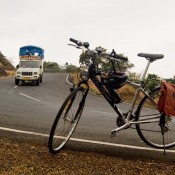
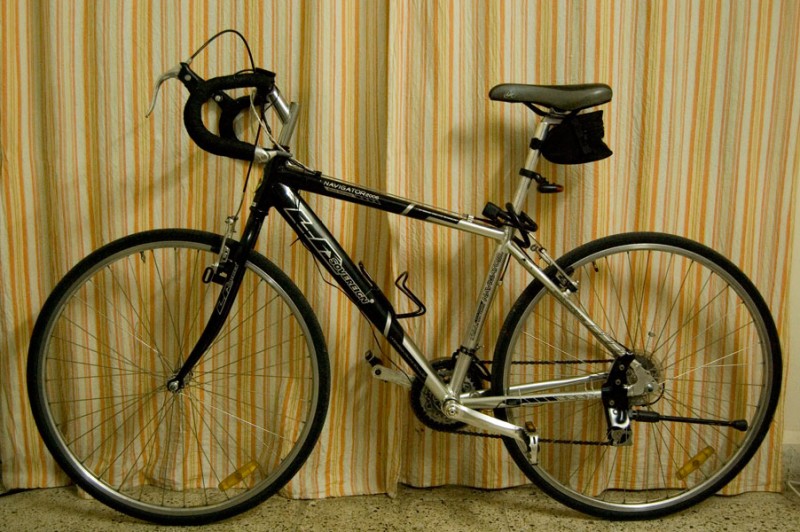
Post-conversion look of the bike

It is no secret that I am a big fan of the Navigator bicycle. Although it is not a top of the line product, it hits a sweet spot between features, comfort and affordability. There are times when I crib about the less than stellar performance of many of its components. But that cribs quickly die down after I consider that better performance would involve unpleasant tasks like spending money.

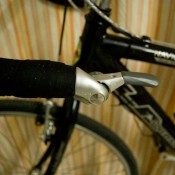
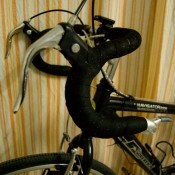
Cheap-ass local brake levers

At the time of purchase I had also hoped it would be less of an attention getter than a Trek or Merida. But I can safely say that is misguided hope because the Navigator is definitely a class better in design, style and finish than other Indian brands and easily sticks out in a crowd. But I still do leave it unattended in public areas at times with just a cable lock to hold it down and thankfully, have always returned to find it as I had left it. I am pretty certain that a Bianchi Aeron or a Merida Crossway left like that on the busy streets of Sadashiv Peth would disappear faster than bank executives after a bailout.

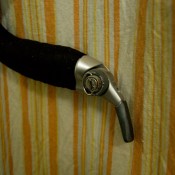
Ultegra front shifters (friction-only)

Big Man on a Little Bike and Other Justifications

It took some time for my interest to deepen in bicycling enough to consider things like fitting. But a chat with Rajesh Nair after a ride around Pune found me fumbling with body measurements and running the numbers through an online fit calculator. A few minutes later, the bearded old man working at the Competitive Cyclist announced his verdict. The Navigator was at least 2 centimetres smaller than what would be an ideal size for me.

Ultegra rear shifters (can be run indexed or in friction mode)

This explained all the shoulder pain that I had been experiencing after long or fast-paced rides. The upright posture was also inefficient due to increased resistance in windy conditions, and although I was not very certain at that time, there was a gut feeling that the stooped posture on drops would increase pedalling power.

Unlike popular misconception, riding in the drops does not give a person a bad back. On the contrary, riding upright is the problem, as described by Sheldon Brown (all hail!).

When riding a bicycle, the back should be arched, like a bridge, not drooping forward between the hips and the shoulders. If the back is properly arched, bumps will cause it to flex slightly in the direction of a bit more arch; this is harmless. If you ride swaybacked, bumps will cause the back to bow even farther in the forward direction, which can lead to severe lumbar pain. Some back-pain sufferers modify their bicycles with extra-high handlebars so that they can sit bolt upright, with their spines straight. This is actually counterproductive in most cases, because a straight spine has no way to “give” when the bike hits bumps. Road irregularities will jam the vertebrae together, often aggravating existing back problems. The bolt-upright posture is comfortable if you’re sitting stationary on the bike, but is not suitable for riding much faster than a brisk walk. Riders who for some reason require such a position should use some form of suspension…a sprung saddle at the very least.

Lastly, I was missing the bar-ends on my previous bicycle and the multiple grips they offered. They made for more comfortable hands and wrists and were an absolute boon on long rides. It would be nice to have the ability to change grips again after the modification.

Beware! There be Dragons in here.

It actually makes little sense to put a bike through extensive modifications like changing handlebars. It is expensive, time consuming and opens a wide window of opportunity for unscrupulous dealers to rip you off. If you have a choice between modding an existing bike and buying a new one, it makes more fiscal sense to make a new purchase. But if you are cramped for options or just plain sadistic, let us delve further into the pitfalls.

Purchasing spares in retail is very expensive. And most of the awesome gizmos are not available at local dealers. Which means you will be begging your Ramesh Uncle from Atlanta to bring your bar-end shifters when he returns for his annual homecoming and pray he gets the model numbers right, or else order online and get doorstep delivery.

Each strategy has its pros and cons. Ramesh Uncle might gift your “cycling kit” to you for free, but you have to risk receiving MTB grips instead of shifters because he would not know a shifter if it came and bit his ass. You won’t face that problem with an online purchase, but the associated cost of delivery is going to send the effective cost into the stratosphere, maybe even more than what you paid for the entire bike when you bought it new.

Finally, if the store owner you approach for this modification does not have a conscience, he will gladly lighten your wallet by overcharging you for spares and labour or giving your spurious spares, so your “Shimano” brake levers will last all of 2 weeks or until the first time you press them real hard in an emergency, more in line with typical Chinese-made “Shivamo” products.

So, work hard at learning the mechanics, brand names, model numbers, prices and warranty before even approaching a dealer. Then, when he spouts some bullshit about thumb shifters costing Rs. 1000 apiece, you can call it.

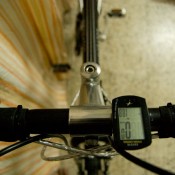
Cateye Strada cycle-computer (recommended!)

You must study, study and study some more, followed by a written examination and a trial by fire before getting into any such stuff. If you are fortunate enough to have access to more established high-end cycling communities and dealers then you can be exempted from the examination and trial by fire because chances are the service technicians know what they are doing. But since their counterparts in India often believe that the hammer is the solution to all derailleur alignment problems, you need to make up for their knowledge gaps. It helps to be physically present at the store to keep an eye on what shenanigans the bike store employees are up to with your mobile, to lend a hand for some of the simpler tasks and maybe picking up a few pointers along the way.

Making Change Happen

Over several months of reading about a handlebar conversion, the one sentiment that echoed repeatedly was that aero brake levers would not work well with the direct pull brakes on my bike. I kept that information at the back of my mind though, because the dealers I met to consult and cost-compare all assured me that they would make the twain work together like old friends. For what it’s worth, I’m still riding that way and happen to find no serious problems so far. But don’t take my word for it.

I handed the bike over to the care of the mechanics at Surendar Cycles, hoping to pick it up a few days later. There was a bit of a let-down because they were not able to deliver on time because spares could not be sourced easily. The handlebar and bar tape were purchased from Firefox Bikes. I settled for cheap, aero brake levers. And for shifters, I initially had to go with locally made Starlit thumb shifters. These would have been fine, except that they took up prime real estate on the top of the bar, leaving little room for the computer.

I chose the Firefox alloy handlebar over a locally made steel bar to trim weight. It works and there are options in the market at both ends of this one. Cheaper steel bars can do if you are in a pinch, or if you have money to spare, more high end ergo-bars can make for a more comfortable ride. Take your pick.

We also ordered Firefox bar-tape, but it ripped to shreds within the first 2 weeks. I could have easily avoided this expensive mistake by reading some reviews online beforehand. But you can learn from my experience and need not make the same mistake.

Finally, for some unexplained reason, the service folks installed 6-indexed rear shifters for both front and rear derailleurs. As a result, the shifter connected to the front would be highly tensed at the highest setting. A normal rear shifter expects no pull from the cables at its highest setting because they are at their slackest at that point. Because the conditions were now reversed (highest setting, maximum cable pull), the slightest bump or turning the handlebar too much would cause the cable to pull hard on the shifter mechanism and make it jump to a lower setting. This was not an ideal situation to be in and downright dangerous when cornering at high speed on tight turns.

The alternative was to purchase a good set of quality shifters myself. I could not wait for or trust anyone returning from abroad to get the correct shifters for me. I also had a strong dislike for thumb shifters now because they just did not complement the drop bars. After a lot of soul searching, seeking advice on forums and intense meditation on my bank account and the potential impact on my pension portfolio over the next 40 years, I decided to spring for entry level Shimano Ultegra 64 8-speed bar-end shifters.

Evans Cycles has the best deals for these shifters. At £52, and Evans free shipping policy for goods over £50, these were affordable. I threw in Cinelli bar tape for £8 to replace the already worn out Firefox tape and condemned my frugal self to eternal guilt of extravagance.

Real Men Don’t Index

The shifters were delivered exactly a week later. Instead of taking them to Surendar Cycles though, I rode out to Rider Owned Bicycles at Koregaon Park. I had been hearing about them for very long and wanted to try out their service and expertise for a simple project like this one.

The bar-end shifters are special in that they only support friction mode for the front shifter and either indexed or friction shifting for the rear shifter. After a few mismatched shifts in indexed mode, probably because I am still stuck with a 7-speed Tourney cassette, I switched over entirely to friction mode. It seems a bit daunting before you actually try it. But friction mode is really not very different from indexed shifting when performance isn’t high on the priorities. I don’t think I will regret this decision.

Final Thoughts

The conversion has been one of the best decisions I made since purchasing the Navigator. The shifters do hike up the purchase price of the bike quite a bit. But the cost is more than repaid with the comfort, looks and performance post conversion. My lower-back and shoulders hurt no more even after a longish ride. I can attribute the first to drooped posture and the second to the increased reach facilitated by the drop bars. I have been taking it out for spins for a month now and hope to send it through a more thorough grind in the next several days.

The shifters did increase the cost of the bike substantially. Looking harder would have uncovered cheaper shifters such as old Suntour’s. But considering that I was mid-way through a conversion, with my bike completely unusable because of the unreliable performance of the Starlit shifters (due blame on the mechanics for this boo-boo too), I had to rush through the best available option. Bringing all spares together beforehand will ensure a smoother conversion for you.

If LA Sovereign or an add-on provider sold off-the-shelf conversion kits, this task would be much easier. It could probably consist of the drop bar, shifters, brake levers, centre-pull brakes, accessories to go along with these components (cables, hooks, screws, etc.), all priced reasonably. I see no problem in this approach, because with the mudguards and rear-rack that the Navigator comes with, it effectively would convert it into a low-end touring bike. The only other road bike that LA Sovereign has in its line-up is the Urbano, which is more than twice the cost of this bike. But with no facility for mudguards and a rear rack on it, there is hardly any chance of overlapping user requirements. LA Sovereign can continue to target performance bikers with the Urbano while catering to the needs of commuters and tourers with the Navigator and an optional conversion kit.

Ride to Lion’s Point

Early Morning

Being inspired by Sudipto’s ride last Sunday, I had planned my own trip down to Lonavala on Thursday. The plan had to be shelved because we were up till late on Wednesday night following the situation in Mumbai. But I had an itch and it needed scratching. So I realigned my plans for Saturday.

The original idea was to leave early by 5:30 in the morning. Lonavala is just a couple of hours ride from here, so I could be there by early morning, have breakfast and return by around lunchtime. But I overslept instead, and it was 7:00 by the time I was ready to leave. Being late however turned out to be good for me. It had been raining earlier in the morning and riding through the cold rain wouldn’t have been a very pleasant experience.

I donned a jacket to keep out the cold and took off. It was well past daybreak and there was no need for additional lights on the bike. The dynamo on my bike had anyway been damaged earlier and I was not very keen on wasting time attaching the lights from my wife’s bike onto my own. I could feel the nip in the air even as I carried the bike downstairs. The cold air struck my bare legs as I began to ride. Winter’s here, I thought to myself.

Climbing up to Lion’s Point

The journey up to Lonavala itself was rather uneventful. I clipped along at a steady 20 km/h and stopped for a bite every hour. It was yet quite cold and the warm missal-pao at 8:30 am provided welcome relief. I was just beyond Vadgaon and just a few kilometres away from Kamshet Ghat. During my previous trips to Lonavala on the Exodus, I had been unable to ride up this incline and had to resort to pushing the bike up. But I was confident that the Navigator would change the equation entirely.

And I wasn’t disappointed. Even more fun was the long slope at the other side of the hump. A light road bike really is a pleasure to ride in such conditions.

Reaching Lonavala

Once past Kamshet, the road turns into a very gentle incline towards Lonavala. This had to be the easiest ten kilometres of the trip. A strong crosswind blew from the right, but didn’t hamper progress much. It was chilly and overcast though and there wasn’t even a glimpse of the sun even though it was past 9:00 am. I left the jacket on.

I reached Lonavala exactly at 10:00 in the morning. The odometer read 60 kilometres. The main market of Lonavala had already gone by and I was on the road leading to Bhushi Dam. There was no planned destination in my mind and it seemed quite silly now to just cross the market and come back. This wasn’t exactly a shopping trip.

I munched upon a few biscuits while ruminating upon my further plan of action. Curious passers-by stared or waved at me while I waited at the corner. There were few tourists on this road and the ones who did pass by in their cars cheered or waved past. Hunger satiated, I mounted the bike again and began to ride towards Bhushi Dam. The dam itself is a little off the road and attracts many visitors during the monsoons when it overflows. But this was off-season and it would probably be dry. No other vehicles passed me by till I reached the village near the dam.

Destination – Lions Point

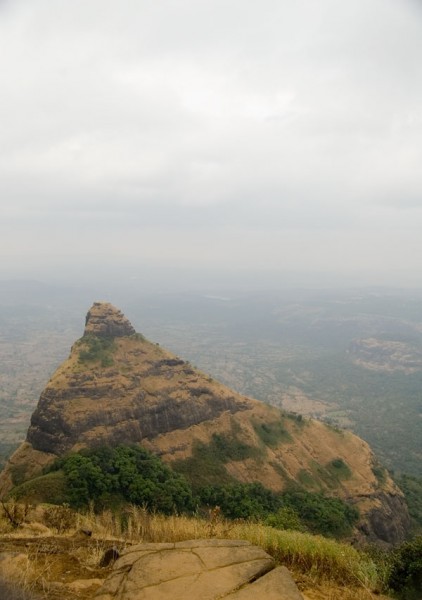
View from the top

Since I had no interest in stopping at Bhushi Dam, I continued to ride further on. There were two navy and air-force installations further down the road so I was expecting some sort of end-of-the-road sign ahead. Surprisingly, no such thing happened. The road branched off towards the navy base a little further, leaving me with more roads to explore. And signs began to welcome me to Amby Valley.

I now had a new destination in mind.

However, a huge climb lay between the valley and me. Cars and motorbikes zoomed past at several kilometres an hour while I crept along in single digit speeds. I stopped several times to catch my breath before finally giving up and began pushing the bike up till I reached the air-force station at the top of the hill. Once there, I mounted again and began to enjoy the relatively flatter terrain. At one point I noticed a sign indicating a spot called Lion’s Point. I dropped the idea of going all the way into the valley again at the other side and having to face another treacherous climb on the way back and instead aimed to turn back at this spot.

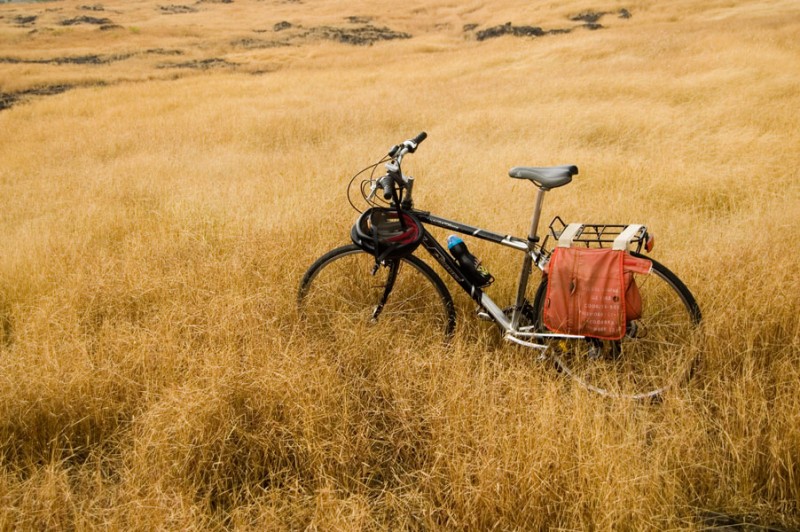
I rolled into a flat open space by the roadside just as the odometer touched 70 kilometres. “Lions Point” – the sign read. The wind was blowing wildly. It was a steep drop from the edge of the cliff. My bicycle and backpack had to be held down to prevent them from taking a leaping dive down. I pushed the bike a little away from the edge behind a locked down handcart and tied it there. I then set off to explore the views and take some pictures of the breathtaking surroundings.

There was nothing to hear except the whistling of the winds. Even the chirping of the birds was drowned in this sound. Then all of sudden the wind died down I was startled by a whining sound behind me which turned out to be a dog, probably expecting a treat. But it was scared away when I jumped 3 feet up in the air in surprise.

Jeez.

The Return Journey

I picked up my bag and camera and headed back to the bike. It was nearing 1 in the afternoon and I was dying for a bite. The ride down was fascinating and I zipped down in a few minutes. A motorcycle rider headed in the opposite direction was taken aback when he saw me coming down a curve and hollered out. Some of the locals from Bhushi village gathered to wave out from the sides of the road. One of the kids coming from the opposite direction on a bicycle shouted gleefully, “Racing! Racing! Good luck.” I smiled and waved back.

Twenty minutes later I was back in Lonavala market, tucking into a meal.

At 2 pm, I began the ride back to Pune. I was now faced with a double whammy – the gentle incline in the road till Kamshet meant I was going to be riding upwards for most of this road. To make things difficult, the crosswinds had changed direction and were now coming on at me from the full-front. My speed dropped down to between 10-12 kilometres an hour and I had to stop for a break every half an hour or so. I was beginning to fear what effort the Kamshet climb would entail.

Surprisingly, the winds died down during the uphill at the ghat, but came back double quick on the other side of the hump. The lull in the headwinds had probably been because the mountain itself shielded me from them. I had to stop pedalling on the other side and focus only on keeping the bike straight, such was the force of the winds.

Conditions remained like this for practically the rest of the way up to Bhakti-Shakti Chowk at Nigdi – a full 50 kilometres from the outskirts of Lonavala. The highway was now packed with traffic and motorcycle riders would pass by slowly wondering what kind of crazy creature had been let loose here. Some waved. I finally gave up riding at the outskirts of Nigdi – about a kilometre before the Bhakti-Shakti Chowk and began pushing the bike through the dirt at the side of the road. Not only was I tired, but the two-lane road was getting filled with agitated drivers racing against each other. Several times I saw cars from the opposite side coming into my lane and heading towards me at breathtaking speeds, turning back into their lanes just metres ahead of me.

Once back on a real road, I took upon the bike again with gusto. The buildings surrounding me broke the winds finally and I was able to pick up a decent pace again. It was 15 kilometres from here to home.

I covered the rest of the distance in an hour, mainly slowing down near Kasarwadi due to traffic.

It was 6 by the time I reached home – 11 hours since I left. The odometer read 141 kilometres.

Difference Between a Pointer and a Pointer-to-pointer in C

C passes variables by value. So if you pass 2 ints x and y to the function square(), it creates a copy of both variables, populates them with the same value as x and y and hands them over to the function to process.

int square(int x, int y)
{
  return x * y;
}

int main(void)
{
  square(a, b);
}

The same thing happens with pointers. A char *a points to location 0x000000 (or NULL) in memory. The variable is then passed to a function initString(). Now a copy of the pointer is created, which also points to the value 0x000000 and is processed by the initString() function. Within initString(), new memory is allocated using malloc() to the variable a.

void initString(char *x)
{
  x = malloc(6 * sizeof(char));
  sprintf(x, "%s", "Hello");
}

int main(void)
{
  char *a = NULL;
  initString(a);

  printf("%s\n", a);
}

Output

(null)

What happens in this case is that a fresh pointer variable is created, which happens to point at the same location as a, which is initially NULL. Then memory is allocated to this pointer in the initString() function, so it begins to point to the location returned by malloc(). When the function returns, the x variable is destroyed (and the memory allocated to it is now unreferenced, which creates a memory leak). In the meantime, a is still pointing to NULL.

Now let us change the signature of the initString() function.

void initString(char **x)
{
  *x = malloc(6 * sizeof(char));
  sprintf(*x, "%s", "Hello");
}

int main(void)
{
  char *a = NULL;

  initString(&a);
  printf("%s\n", a);
}

Output

Hello

In this case, a is still pointing to NULL. However, instead of passing a directly, initString() is handed over a reference to the pointer a – a pointer to a pointer. This causes a pointer variable to be created which points to the memory location of a. Now, the dereference operator (*) can be used to locate the address of a. Thus the memory address returned by malloc() can be assigned to a.

This method is not needed if you have already allocated memory to a char array in the calling function. This is because the pointer parameter in the callee function also refers to the same memory address allocated in the caller function.

Here’s a quick working example that demonstrates the differences between a pointer and a pointer-to-pointer when passed on to a function.

#include <stdio.h>
#include <stdlib.h>

void initString1(char *a)
{
  a = malloc(6 * sizeof(char));
  strcpy(a, "Hello");
  printf("initString1():\t%s\t%p\t%p\n", a, a, &a);
}

void initString2(char **a)
{
  *a = malloc(6 * sizeof(char));
  strcpy(*a, "World");
  printf("initString2():\t%s\t%p\t%p\n", *a, *a, &*a);
}

int main(int argc, int *argv[])
{
  char *b = NULL;

  printf("Function |\tValue\tPoints to\tAddress\n", b, b, &b);
  initString1(b);
  //strcpy(b, "World"); // Crashes
  printf("main() :\t%s\t%p\t%p\n", b, b, &b);

  initString2(&b);
  strcpy(b, "Hello");
  printf("main() :\t%s\t%p\t%p\n", b, b, &b);

  return 0;
}

Ride Therapy!

At 4:35, I was practically gasping for some fresh air. It had been a long day, and I was in no mood to be cooped up at my desk. Not being able to rein in the bug-list worsened things. I threw in the towel at 4:40. Screw it. Life was calling and I wasn’t going to let it pass by.

At 4:40 I was on my bike racing away from office. Anywhere! In my mind I planned to visit the new Baner road again, touch Sadanand Hotel and be back in half an hour. It quickly corrected course though and replanned the route to head instead in the opposite direction towards the lush green DRDO estate. This road would lead into the Bombay-Bangalore bypass from where I could merge back into Baner, take in the new road one more time and then return back to work. It would probably take closer to an hour. Ahhh! That’s better.

20 minutes later I was riding gaily through DRDO, taking in the cool late afternoon clime. I kept an easy pace and did some math in my head about wheel sizes and speeds. But at no time was I missing out on the view though. Necklace Garden was a welcome sight with its beautifully manicured and freshly watered lawns. It ended all too soon though and I had to turn off towards the bypass.

“Weak bridge. Heavy vehicles not allowed.”, the sign read. I hoped the Navigator would cut it through and sailed across, right in the middle of the highway.

The road inclined upwards gently past Pashan Lake. The only sound was of the chain whirring and the wheels spinning. Trucks rumbled by occasionally. I was at the top of the incline, just before the Pashankar Showroom – my favourite spot on this road. I smiled and let the wheels do their thing. What followed was an exhilarating experience of sheer simplicity. The bike picked up pace and was quickly running in the low forties while I held on and enjoyed the thrill.

I was already much feeling much better.

I turned off the bypass into Baner and continued to sit back until the inclines turned northwards again. Even then, I kept an easy pace and enjoyed the warmth of the setting sun behind me.

I was back in my seat exactly an hour later. Nerves soothed, it was back to the grind. But with a smile this time.